
Zone 2 cardio is the rare training idea that earns its hype — better fat oxidation, more mitochondria, stronger aerobic base, and easy days that finally feel easy. The catch is that "Zone 2" only works if you're actually in it. And for most recreational athletes without a lactate meter, the number on the watch is closer to a guess than a measurement. The 220-minus-age formula can put your real aerobic threshold 20+ bpm away from where it says it is.
This review covers three field tests you can run with a heart rate monitor, a flat route, and an honest sense of effort: the talk test, the nasal-breathing check, and the 60-minute heart-rate drift (decoupling) test. It rates what each does well, where each breaks down, and finishes with a 4-week calibration plan that combines all three.
Quick verdict: Talk test + nasal breathing + 60-minute decoupling is a genuinely useful stand-in for lab lactate testing — about 4.5 out of 5 as a combined toolkit. Best for healthy runners, cyclists, and rowers training 3–8 hours a week who want their easy days to stay easy. Main caveat: these are proxies, not measurements. If you take a beta-blocker, have a diagnosed cardiac condition, or train with a device whose heart-rate readings you don't trust, book a lab test or get medical guidance instead.
Quick Takeaways

- Age-based max heart rate formulas carry roughly ±10–12 bpm of individual error, and different formulas disagree by up to ~17 bpm at the same age.
- The talk test is your daily guide; nasal breathing is your in-session check; the drift test is your monthly confirmation.
- Heart-rate drift under 5% during a steady hour is a solid sign you're at or below aerobic threshold.
- Retest every 6–8 weeks, after illness, and after altitude or big training changes — not once, ever.
- Heat, caffeine, dehydration, stress, and poor sleep can shift your Zone 2 heart rate by 5–10 bpm before you change your pace at all.
Why the 220-Age Formula Can Misplace Your Zone 2 by 20+ BPM
The formula is a population average wearing a lab coat. It was never meant to be applied to one person, and it isn't accurate enough to anchor a training zone. The error compounds twice: once in estimating max heart rate, and again in converting that estimate into a Zone 2 band.
Here's how much the common formulas disagree for the same 50-year-old athlete:
| Formula | Estimated HRmax | Zone 2 at 60–70% HRmax |
|---|---|---|
| 220 − age | 170 | 102–119 bpm |
| Gulati (women) | 162 | 97–113 bpm |
| Tanaka (208 − 0.7 × age) | 173 | 104–121 bpm |
| Nes (211 − 0.64 × age) | 179 | 107–125 bpm |
The top of Zone 2 alone swings about 12 bpm across those four formulas. Now add the fact that any individual's true HRmax can sit roughly ±10–12 bpm (about one standard deviation) from a formula's prediction. Stack the two and a 20+ bpm misplacement is not a rare edge case — it's an ordinary Tuesday for someone with an unusually high or low max heart rate.
Percentage of max isn't the only problem
Using HRmax alone ignores resting heart rate, which matters just as much. Take two athletes with the same HRmax of 180:
- Athlete A (resting HR 45): 60–70% of heart rate reserve = roughly 126–139 bpm
- Athlete B (resting HR 70): 60–70% of heart rate reserve = roughly 136–147 bpm
Same max, same "Zone 2" label, 10 bpm apart. That's why the Karvonen method (heart rate reserve) is a better starting point than straight percentage-of-max — and why even that needs a field check.
Zone 2 also means two different things
In a five-zone model, Zone 2 is usually defined as 60–70% of HRmax. In a three-zone or polarized model, Zone 2 means "below the first lactate threshold (LT1)," which is a physiological event, not a percentage. For most trained athletes those land close together, but for beginners and for very fit athletes they can drift apart. Field tests target the physiological definition, which is the one that actually drives adaptation.
Review Criteria: What Makes a Field Test Worth Using
I judged each test on six things: how closely it tracks LT1 or the ventilatory threshold, what gear it needs, what it costs, whether you can repeat it under similar conditions, how hard it is to learn, and how it fails. Here's the summary before the detail.
| Test | Accuracy vs. LT1 | Gear Needed | Time | Best Use | Weakest Point |
|---|---|---|---|---|---|
| Talk test | Good (high) | None | Continuous | Every easy session | Subjective; distorted on hills |
| Nasal breathing | Moderate–good | None | Continuous | In-session cap check | Fails with congestion or a deviated septum |
| 60-min drift (decoupling) | Good | Chest strap, flat route | 60 min | Monthly validation | Needs controlled conditions |
Test 1 — The Talk Test: Sentence-Length Rule and RPE Anchors
The talk test is the single most practical field method because it needs no equipment and works during a normal training session. The rule is simple: at the top of Zone 2 you can still speak a full, unbroken sentence of roughly 10–15 words in one breath. When you can only manage four or five words before grabbing air, you've crossed into Zone 3.
The protocol
- Warm up 8–10 minutes at an easy effort.
- Settle into a steady pace on flat ground — not a hill, not an interval.
- Speak one full sentence out loud. Counting aloud or reciting something memorized keeps it consistent.
- Interpret the result: comfortable full sentence = at or below LT1. Chopped phrases = above it.
- Anchor it with an RPE of 3–4 out of 10 — breathing is deep and rhythmic, you could hold the effort for 60–90 minutes, and you're not counting down the minutes.
- Recheck every 5 minutes. If you lose the sentence, slow down 10–15 seconds per kilometre (or 20–30 watts) until it comes back.
Pros: free, portable, works on any sport, no calibration, and it directly tracks breathing rather than a proxy for breathing.
Cons: subjective, hard to use on hills or intervals, and unreliable if you're doing intervals with a training partner or listening to something that changes your speech pattern. Heart rate lags effort by 60–90 seconds, so pair the talk test with a look at your HR trend rather than a single reading.
Test 2 — Nasal Breathing Only
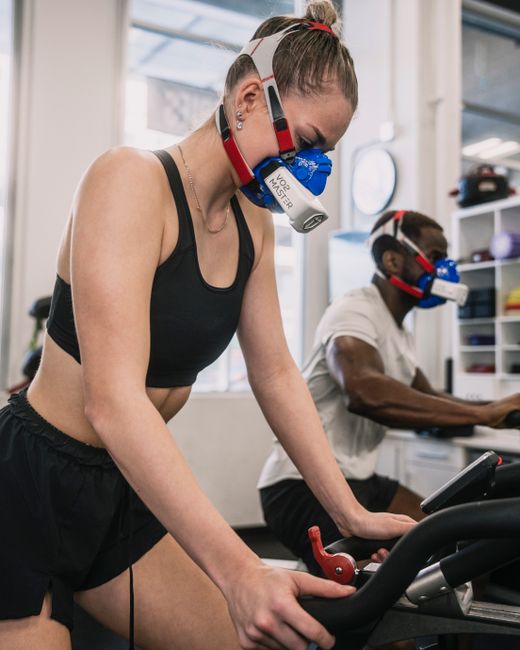
For most healthy athletes, the point where nose-only breathing stops feeling sufficient sits near the first ventilatory threshold — which is a close cousin of LT1. It's not exact, but it's a usable in-session brake.
The protocol
- Warm up normally, then commit to breathing only through your nose.
- Hold a steady effort for at least 10 minutes.
- Note the pace, power, and heart rate at the moment you feel you must open your mouth.
- Drop the effort slightly until nose-only breathing is comfortable again. That pace/HR combination is your working Zone 2.
Pros: instant feedback, no gear, and it catches the drift toward Zone 3 that happens quietly on long runs.
Cons: the test breaks the moment you have a cold, allergies, dry air, or a deviated septum. Cold weather and altitude also shift the break point, so it's a daily guide rather than a fixed number. If your nose is blocked, use the talk test instead.
Test 3 — The 60-Minute Heart-Rate Drift (Decoupling) Test
This is the closest thing to a confirmation test you can run without a lab. The idea: hold a steady effort on flat ground for an hour. If your heart rate rises significantly while pace and conditions stay the same, the effort was above your aerobic threshold — or you were hot, dehydrated, or under-fuelled.
The protocol
- Use the same flat route, the same time of day, and similar weather. Skip caffeine for 4 hours beforehand and avoid a heavy meal in the previous 2 hours.
- Warm up 10 minutes, then hold a constant effort for 45–60 minutes at your candidate Zone 2 pace.
- Record average heart rate and pace (or power) for the first half and the second half separately.
- Calculate decoupling: (second-half HR ÷ second-half pace) ÷ (first-half HR ÷ first-half pace) − 1, then multiply by 100.
How to read the result:
- Under 5%: strong aerobic coupling. Your candidate Zone 2 is probably correct.
- 5–10%: borderline. Drop the target pace by 5–10 seconds per kilometre and retest.
- Over 10%: you're above LT1, or you had a bad day with heat, hydration, or fuelling. Fix the conditions first, then retest.
Pros: objective, repeatable, and it uses your own physiology instead of a formula. A chest strap is strongly recommended — wrist optical sensors are prone to error, especially in cold weather or on rough terrain.
Cons: it costs an hour and demands controlled conditions. Cardiac drift of 5–10% over 90 minutes is normal even at a true Zone 2, so keep the test at 60 minutes or less for cleaner numbers.
How to Combine Them: A 4-Week Zone 2 Calibration Plan
Each test on its own is decent. Used together over four weeks, they cross-check each other and cancel out most of the error. Here's the sequence.
| Week | Focus | Action | Outcome |
|---|---|---|---|
| 1 | Baseline | 3–4 easy sessions of 45–60 min using the talk test only. Log HR and pace. | Provisional HR cap: the highest HR where full sentences still work |
| 2 | Nasal check | Repeat the same sessions, nose-only until the break point. Compare with week 1. | Adjust the cap up or down by 3–5 bpm |
| 3 | Drift test | One 60-minute steady session. Compute decoupling. | Confirms or rejects the cap |
| 4 | Set and confirm | Train at the final cap. If decoupling was over 5%, drop 5 bpm and repeat week 3. | Locked-in Zone 2 range for the next 6–8 weeks |
If the talk test and the drift test agree, you're done. Set your training cap 2–3 bpm below that ceiling so ordinary day-to-day noise doesn't push you over it.
Common Mistakes That Break These Tests
1. Chasing a fixed heart-rate number
Heart rate is a response, not a target. It lags effort, climbs in the heat, and drops when you're fresh. Use it as evidence, not as a command.
2. Ignoring heat, caffeine, stress, and sleep
A hot afternoon can add 5–10 bpm at the same pace. Caffeine can add a few more. Poor sleep and a stressful workday push it up again. If you test under different conditions and change your zones as a result, you'll be recalibrating to noise.
3. Never retesting
Aerobic fitness improves, and your Zone 2 pace moves with it. Retest every 6–8 weeks, after illness, and after a stint at altitude. A cap you set in March may be 20 seconds per kilometre too slow by June.
4. Testing on hills or during intervals
Effort changes faster than heart rate does. The talk test and drift test both need steady, flat conditions to mean anything.
5. Trusting wrist optical heart rate for the drift test
Optical sensors struggle with cold, sweat, and arm movement. For a test that hinges on a 5% threshold, a chest strap is worth the money.
6. Letting the watch's auto-zones stand
Most wearables build zones from an age formula or a max HR you entered once. Treat those as defaults to be overwritten with your field-tested numbers.
Who These Field Tests Are Best For — and Who Should Skip Them

Best for: healthy recreational runners, cyclists, rowers, and triathletes training 3–8 hours a week; athletes whose "easy" runs keep creeping into moderate; anyone training by heart rate who doesn't want to pay for repeated lab sessions.
Skip or modify if you:
- Take beta-blockers, calcium channel blockers, or other medications that blunt heart-rate response — the talk test still works, but nasal and drift readings will mislead you.
- Have a diagnosed cardiac condition, a pacemaker, or unexplained chest pain or breathlessness during exercise. Get cleared first.
- Have moderate-to-severe asthma or COPD, where breathing cues don't track effort the way they do for healthy athletes.
- Have a deviated septum, chronic congestion, or severe seasonal allergies — drop the nasal test and rely on the talk test.
- Are pregnant or returning from a long layoff. Field tests are still useful, but clear them with your clinician first.
Alternatives and Comparisons
Lab lactate testing remains the gold standard. A single session typically runs $150–$300 and gives you LT1 directly instead of a proxy. It's worth it if you're highly competitive, have unusual physiology, or want one definitive answer before committing to a training block.
LTHR field testing (a 30-minute maximal effort, taking average heart rate over the final 20 minutes) gives you a lactate-threshold heart rate to build zones from. One caution: zone models built on LTHR use different percentages than models built on HRmax. Use the same source for both the test and the zone table, or you'll mix systems.
MAF 180-minus-age is a simple starting cap that many recreational athletes use. It's still a formula, with the same individual-error problem, but it's easy to adjust using the talk test — so it works fine as a week-one guess.
Wearable auto-zones are convenient and no more accurate than the inputs behind them. They're a starting point, not a verdict.
Final Recommendation
If you want Zone 2 benefits without a lab, use all three tests in the roles they're good at. The talk test is your daily guide — it costs nothing and it's right there in your lungs. Nasal breathing is your in-session check to catch quiet drift on long sessions. The 60-minute drift test is your monthly confirmation and the closest thing you'll get to a threshold measurement at home.
Overall rating: 4.5/5. The half-point is withheld for a reason — these tests are proxies, they need controlled conditions to be reliable, and they don't work for athletes on heart-rate-altering medication. For everyone else, they beat a formula by a wide margin. Set your cap 2–3 bpm below where the talk test and drift test agree, then retest in 6–8 weeks.
Frequently Asked Questions
What is Zone 2 heart rate for a 40-year-old?
The 220-minus-age formula gives 180 bpm max and roughly 108–126 bpm for Zone 2 at 60–70% of max. But that formula carries ±10–12 bpm of individual error, so validate the number with the talk test before you train to it.
How long should a Zone 2 session be?
Most recreational athletes get good results from 45–90 minutes per session, three to four times a week. The drift test itself needs a full 60 minutes to produce a clean decoupling number.
Can I use the talk test on a bike or rower?
Yes. The same 10–15 word sentence rule applies. Cycling tends to let you speak in slightly longer phrases than running at the same relative effort, so compare your results within the same sport rather than across sports.
Do I need a chest strap?
For the talk test and nasal check, no. For the drift test, yes — strongly recommended. A 5% decoupling threshold is small enough that optical sensor noise can flip your result.
How often should I retest my Zone 2?
Every 6–8 weeks, after any illness that interrupts training for more than a week, and after a change in altitude or a significant jump in training volume.