If you're lifting weights after 40, your body doesn't care how strong you feel—it cares how well you move. Mobility limitations are the silent driver behind torn rotator cuffs, chronic knee pain, and lower back flare-ups that derail training for months. The good news? You don't need a physical therapist in the room to know whether you're safe to load a barbell. Three simple, self-administered mobility tests—rooted in physiotherapy screening standards—can tell you whether your joints are ready for resistance training or whether you need corrective work first.
This review breaks down each test with concrete pass/fail thresholds, explains what failing means, and outlines the minimum corrective work needed before you progress. Think of this as a pre-flight checklist for your body.
Quick Verdict: Should You Screen Before Loading?
Verdict: Yes—absolutely. These three mobility screens are among the most practical, evidence-informed self-assessments available for lifters over 40. They take under 10 minutes, require minimal equipment, and provide clear pass/fail criteria tied to real injury risk patterns.
Best-fit reader: Adults aged 40+ who are currently resistance training or planning to start, especially those returning to lifting after a break, dealing with nagging aches, or progressing toward heavier compound lifts like squats, overhead presses, and deadlifts.
Main caveat: These tests screen for mobility deficits—they don't diagnose pathology. If you have active pain, neurological symptoms (numbness, tingling), or a history of joint surgery, consult a licensed physical therapist before self-assessing or loading.
Pros and Cons of Self-Screening With These Tests
- Pros:
- Quick to perform—under 10 minutes total
- Requires minimal equipment (wall, ruler or tape measure, a stick or broom handle)
- Clear pass/fail thresholds drawn from physiotherapy standards
- Identifies specific deficits before they become injuries
- Gives you a roadmap for corrective work
- Cons:
- Self-administration can reduce accuracy versus a trained clinician
- Passing doesn't guarantee you won't get injured—load management, technique, and recovery still matter
- Doesn't screen for stability or motor control deficits, which also contribute to injury
- Requires honest self-assessment; ego can skew results
Why Mobility Screening Matters More After 40
As we age, connective tissue loses elasticity, joint capsules tighten, and years of sitting compound into restricted movement patterns. Research consistently shows that restricted ankle dorsiflexion is associated with knee pain and altered squat mechanics, while limited shoulder mobility correlates with impingement and rotator cuff pathology. For lifters over 40, these aren't theoretical risks—they're the most common reasons training gets derailed.
Mobility screening flips the script. Instead of waiting for pain to tell you something's wrong, you proactively identify whether your joints can achieve the positions required by your exercises. If your ankle can't dorsiflex far enough for a deep squat, your body compensates—usually by rounding the lumbar spine or collapsing the knee inward. Those compensations, repeated under load, are where injuries are born.
The three tests below evaluate the most injury-prone movement patterns for resistance trainees: ankle dorsiflexion, shoulder overhead reach, and thoracic/hip mobility through the overhead squat pattern. Each has established thresholds in sports medicine and physiotherapy literature.
Test 1: Knee-to-Wall Ankle Dorsiflexion Screen
The knee-to-wall test is the gold standard for measuring ankle dorsiflexion mobility. It directly predicts whether you can achieve the ankle range needed for deep squats, lunges, and step-ups without compensating through the knee or hip.
How to Perform It
- Face a wall in a half-kneeling position, barefoot, with the test foot forward.
- Place your toes about 10 cm (4 inches) from the wall.
- Keeping your heel firmly planted on the floor, drive your knee straight forward toward the wall.
- If your knee touches the wall without the heel lifting, move back 1 cm and repeat.
- Continue moving back until your heel lifts before your knee touches—measure the maximum distance from toe to wall.
Test both sides. Most people have asymmetries, and a difference of more than 1.5 cm between sides is itself a risk factor for injury.
Pass/Fail Threshold
Pass: ≥ 10 cm (approximately 4 inches) from the wall, heel down, knee tracking over the second/third toe.
Fail: < 10 cm, or the heel lifts before the knee reaches the wall, or the knee collapses inward to compensate.
In physiotherapy literature, approximately 10 cm of dorsiflexion is considered the minimum needed for functional activities like deep squatting and descending stairs. Lifters who can't achieve this range typically compensate by early heel lift, knee valgus (inward collapse), or excessive forward trunk lean—all of which increase shear forces on the knee and lumbar spine.
What Failing Means
Insufficient dorsiflexion usually stems from tight calf muscles (gastrocnemius and soleus), restricted joint mobility in the talocrural joint, or scar tissue from prior ankle sprains. For lifters, this means squats will feel shallow or unstable, lunges will pitch you forward, and your knees will take disproportionate stress.
Minimum Corrective Work Before Loading
- Wall calf stretch (gastrocnemius): 3 sets of 30 seconds per side, daily
- Wall calf stretch (soleus): Same position, knee slightly bent—3 sets of 30 seconds per side
- Weighted ankle dorsiflexion mobilization: Use a resistance band anchored around a rack, placed on the front of the ankle joint, while gently driving the knee forward in the knee-to-wall position—2 sets of 10 reps per side
- Foam rolling calves: 60 seconds per side, focusing on tender spots
Re-test weekly. Once you consistently hit 10 cm on both sides without compensation, you're cleared to load squats and lunges with confidence.
Test 2: Overhead Reach / Back-to-Back Shoulder Screen
Overhead pressing is one of the most injury-prone movements for older lifters. The back-to-back shoulder screen—sometimes called the back-scratch test or the combined shoulder mobility screen—evaluates whether you have the total range of motion needed to press a barbell or dumbbell overhead without impinging the rotator cuff or straining the labrum.
How to Perform It
This is actually two movements combined:
- Reach up and back: Standing tall, reach one arm overhead and bend the elbow so your hand hangs down your back, palm facing inward. Try to touch the space between your shoulder blades.
- Reach down and around: With the opposite arm, reach behind your back, palm facing outward, and slide your hand up toward the shoulder blades.
- Attempt to bring your fingers as close together as possible—or ideally, overlap them.
- Measure the gap between your fingertips, or note if they touch/overlap.
- Switch arms and repeat.
Pass/Fail Threshold
Pass: Fingertips touch or overlap on both sides.
Fail: Gap greater than one fist width (roughly 5–8 cm) between fingertips, or significant asymmetry between sides.
This screen assesses combined glenohumeral internal rotation, external rotation, flexion, and abduction. In clinical settings, inability to touch fingertips correlates with restricted posterior shoulder capsule and tightness in the latissimus dorsi and pectoralis minor—common findings in desk workers and anyone who sits for extended periods.
What Failing Means
If you can't reach overhead with adequate range, your body will find it—usually by extending through the lumbar spine. This means overhead presses become lower-back exercises, and the rotator cuff gets pinched under the acromion process with every rep. Over time, this pattern leads to subacromial impingement, the most common shoulder injury in resistance trainees over 40.
Asymmetry between sides is equally important. A difference of more than 2 cm in fingertip distance between left and right shoulders suggests unilateral restriction, which often precedes injury on the tighter side.
Minimum Corrective Work Before Loading Overhead Presses
- Pec doorway stretch: Forearm on doorframe at 90 degrees, gently rotate chest away—3 sets of 30 seconds per side
- Latissimus stretch (foam roller or bench): Kneeling with elbows on bench or roller, sink chest toward floor—3 sets of 30 seconds
- Sleeper stretch (posterior shoulder): Lying on side, arm at 90 degrees, gently push forearm down—2 sets of 10 reps per side
- Thoracic extension on foam roller: Support head, extend over roller at mid-back—2 sets of 10 slow reps
Avoid heavy overhead pressing until you can pass this screen on both sides. You can still train vertical pulling (pull-ups, lat pulldowns) and horizontal pressing (push-ups, bench press) in the meantime—just keep the load moderate and monitor for shoulder discomfort.
Test 3: Overhead Deep Squat Screen
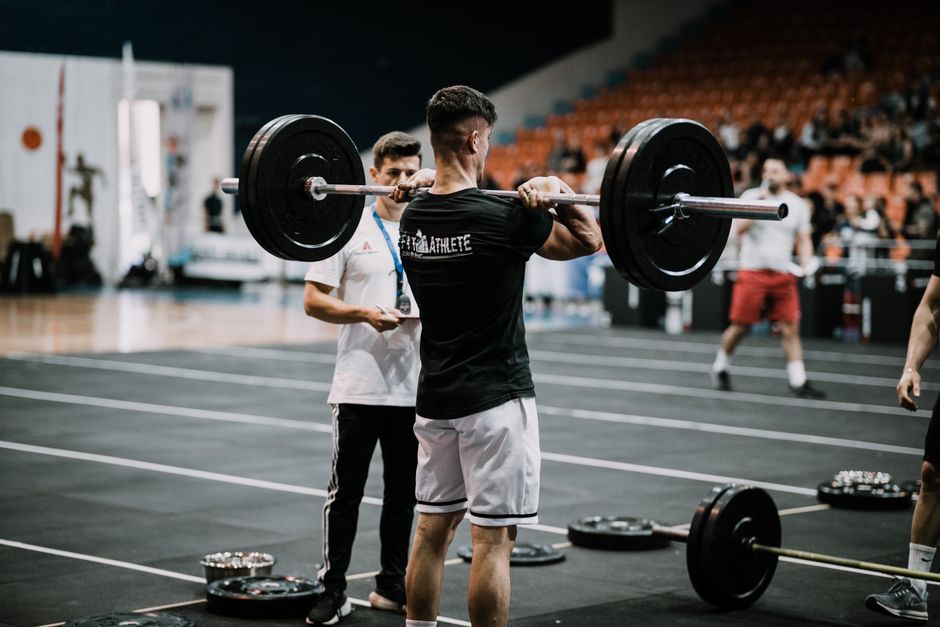
The overhead deep squat is a composite movement that screens multiple joints simultaneously—ankles, hips, thoracic spine, and shoulders. It's used in the Functional Movement Screen (FMS) and widely adopted in sports medicine because it reveals how your body coordinates under a challenging position.
How to Perform It
- Stand with feet shoulder-width apart, toes slightly pointed out.
- Hold a stick (broom handle or PVC pipe) overhead with arms fully extended, in line with your torso.
- Squat as deep as possible while keeping the stick overhead and aligned over your feet.
- Maintain heels on the floor, knees tracking over toes, and an upright torso.
Pass/Fail Threshold
Pass: Full-depth squat (hip crease below knee), heels down, stick stays directly overhead and aligned with mid-foot, no excessive forward lean, no knee collapse.
Fail: Heels lift, stick drifts forward of the feet, torso pitches forward excessively, knees collapse inward, or you can't reach below parallel.
This screen is unforgiving—it exposes whatever your weakest link is. If your heels come up, ankle dorsiflexion is the bottleneck. If the stick drifts forward, thoracic or shoulder mobility is limited. If your knees collapse, hip external rotation or glute activation is deficient. If you round forward at the bottom, hip flexion or core control is the issue.
What Failing Means
Failing the overhead squat doesn't mean one specific thing—it means your movement system has a weak link somewhere. The value is in identifying where the breakdown occurs. Watch yourself in a mirror or film from the side and front. The pattern of compensation tells you which of the previous two tests to prioritize, or whether you also need hip mobility work.
Minimum Corrective Work Before Loading Squats
- 90/90 hip mobility drills: Seated, rotate knees side to side—2 sets of 8 reps per side
- Goblet squat with pause at bottom: Use a light weight to counterbalance, pause 3 seconds at depth—3 sets of 5 reps
- Wall ankle mobilizations: As described in Test 1
- Cat-cow thoracic mobility: On hands and knees, alternate between rounding and arching the spine—2 sets of 10 reps
Once you can perform a bodyweight overhead squat to full depth with clean mechanics, you're cleared to start loading the pattern with goblet squats, then front squats, then back squats—progressing gradually.
How These Tests Work Together
These three screens aren't isolated—they build on each other. Ankle dorsiflexion feeds the squat pattern. Shoulder mobility feeds the overhead reach. The overhead deep squat integrates everything. If you fail all three, start with the ankle and shoulder corrections first, then re-test the overhead squat. Often, improving the individual joint ranges will dramatically improve the composite pattern.
Here's a simple framework for using these tests:
| Test | Pass Threshold | If You Fail, Prioritize |
|---|---|---|
| Knee-to-Wall | ≥ 10 cm, both sides | Calf stretching, ankle mobs |
| Back-to-Back Shoulder | Fingertips touch/overlap | Pec, lat, and thoracic mobility |
| Overhead Squat | Full depth, clean form | Address weakest link identified above |
Who Should Use This Screening Protocol
Best for: Lifters 40+ who are healthy enough to train but want to reduce injury risk before progressing to heavier loads. If you've been training consistently but keep hitting plateaus or dealing with recurring aches, these tests will likely reveal why. They're also ideal for anyone returning to lifting after a layoff—whether from life, injury, or pandemic disruptions.
Also valuable for: Coaches and trainers working with older clients. Having clients perform these screens during onboarding provides objective data for programming decisions and sets realistic expectations for progression.
Who Should Skip Self-Screening
Skip it if: You have active pain in any joint, recent surgery (within 6–12 months), neurological symptoms, diagnosed osteoarthritis with mechanical symptoms (locking, catching), or rheumatoid disease. In these cases, self-screening is inappropriate—work with a physical therapist who can assess you properly and design a targeted program.
Also skip if: You're under 35, have no history of injury, and move well already. The tests will likely confirm what you already know. Your time is better spent on training and recovery.
Alternatives and Complementary Approaches
If you want a more comprehensive assessment, consider the Functional Movement Screen (FMS)—a 7-test battery used by strength coaches and clinicians. It includes the overhead deep squat, hurdle step, inline lunge, shoulder mobility, active straight-leg raise, trunk stability push-up, and rotary stability. The FMS costs money to get certified in, but many gyms offer it through qualified trainers.
Another option is the Selective Functional Movement Assessment (SFMA), which is clinician-administered and breaks down painful versus non-painful movement patterns. This is more appropriate if you have existing pain or dysfunction.
For most lifters, the three tests in this review are sufficient. They target the highest-risk patterns for resistance training and provide actionable pass/fail criteria without requiring professional administration.
Frequently Asked Questions
How often should I re-test?
Every 2–4 weeks while doing corrective work. Once you pass all three tests, screen quarterly as a maintenance check—especially if you change training programs, increase volume significantly, or return from a break.
Can I still train while failing these tests?
Yes, but modify your exercise selection. If you fail the ankle screen, substitute box squats or leg press for full-range squats. If you fail the shoulder screen, use landmine presses or floor presses instead of overhead barbell work. Train what you can do cleanly while correcting what you can't.
What if I pass the tests but still feel pain when lifting?
Passing mobility screens means your joints can achieve the required positions—it doesn't mean your technique, load management, or tissue capacity are adequate. Pain during lifting despite good mobility often points to motor control issues, tendinopathy, or load exceeding recovery capacity. See a physical therapist.
Are these tests evidence-based?
The knee-to-wall dorsiflexion test has established reliability and validity in physiotherapy research. The back-to-back shoulder screen is widely used in clinical and sports settings, with normative data available across age groups. The overhead deep squat is a core component of the FMS, which has been studied extensively—though its predictive value for injury is debated, it remains a useful screening tool for identifying movement limitations.
Final Recommendation
If you're lifting after 40, these three mobility tests are non-negotiable self-screening tools. They take 10 minutes, require almost no equipment, and give you concrete data about whether your body is ready for the loads you're asking it to handle. The pass/fail thresholds are drawn from physiotherapy standards—not arbitrary internet advice—and the corrective protocols are straightforward enough to implement immediately.
The biggest mistake lifters over 40 make isn't training too hard—it's training around limitations they don't know they have. These tests make the invisible visible. Run them this week, address what you find, and you'll train with more confidence and fewer setbacks for years to come.
Action step: Grab a tape measure, a broomstick, and 10 minutes. Screen yourself today. Your future training self will thank you.